Skills Audit
Throughout my experience of AS media I have learnt a lot about the various techniques used in thrillers but also within TV. In addition I have learnt how to organise my ideas by using the blog software on the Internet. I have also learnt how to analyses other thrillers by mise en scene, sound, camera and editing to make our thriller more effective towards the audience. Moreover by analyising I have understood the techniqual term 'intertextuality', which is when similar scenes are used in other films for example
 |
| The Italian Job film |
 |
| The advert- Bakers complete meaty meals uses intertextuality from the italian job |
 |
| Analysis of thriller |
 |
| Green eye girl idea |
 |
| Analysis of thriller |
Secondly, I have also learnt how to set up and use a 'JVC GY-HM100'
and know how to use the functions on there at a particular moment. For example
To switch between recordings and to playback footage simply press 'cammedia' button then use the toggle button to scan through.
To zoom - on top of the JVC GY-HM100 camera there is two set up button just simply hold down the left button to zoom in or the right button to zoom out.
 |
| JVC GY-HM100 |
To keep the camera in focus there are two ways of doing this:
AF (Auto focus)
MF (Manual focus)
MF (Manual focus)
At all time it is best to keep it on Auto focus unless, in your footage the you want to signify a person or an object you would close manual focus.
Finally on the camera there is a 'ND filter' button. When this button is pressed, it reduces the natural light entering the camera lens. it is best not to use this function. unless it is really bright room or really bright weather conditions.
During are Prelim we had to establish what the 180 degree rule. The 180 degree rule basically outlines that when two characters or objects are in the same scene it needs to be filmed on the same side as each other. For example, here is an example of how it has been illustrated:
Thirdly, during the AS media I have been able to familiarise myself with the apple macs and the final cut pro software.
- I am aware that when i need to start final cut pro I need to make sure my hard drive is injected in the computer.
- Then i need to import my clips from my hard drive into final cut pro.
- I then chose the clip i want to edit - by editing i will cut the clip into what i need for the scene and get rid of unwanted footage. I do this by placing input points and output points. On the keyboard I Press 'i' for input and then i press 'o' for output.
- After, I will then drag the clip on to the time line.
- from this I can chose to shorten the clip or lengthen the clip.
- Once placing the clips i can start to add effects. This can be done by changing the filter and the speed of the clip. In addition you can add freeze frames to a chosen footage by clicking on modify and the 'make freeze frame'
- During the editing process they will be a red bar at the end of the clip. This red bar indicates that it need to be rendered. To do this you need to click the tab button and then click render all. Rendering means that the footage needs to be written because there are different settings to the video format so it need to rewrite the footage so the format is the same.
- When adding titles, it is quite simple, what you have to do is click the 'a' button in the bottom left hand corner, on the first footage box. Then click text. This will allow you to write anything you desire for your footage.
- You can change the font, size and colour of your titles by clicking the control tab on the left (first) screen or the screen that allows you to add text.
- Once your text has been added you need to make sure that it is centred in the footage you need to do this by clicking title safe. Making sure that it is inline with the footage and not cut off by the screen.
 |
| Here you can see the tile is not within the blue wire safe |
 |
| Here i have moved so it is within the title safe |
- All you have to do is drag the title on to the clip on time line
- When exporting the footage you have to place your inputs and outputs but you need to press 'O' and 'I' at the start and end of the footage of the timeline.
- Then you export to quick time movie. once that done you use MPEG Streamline to turn it into a mp4. You do this by dragging the MOV file on the video drive to the MPEG Streamline.
- Once you have done that you need to go to File and export to MPEG 4
Forthly, I have been able to be familiarised myself with soundtrack pro.
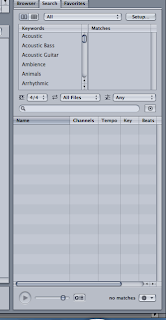
- When adding sound to the footage there are various sound effects and foley sounds available to use. Such as drones and footsteps. Moreover there are different music sounds to chose from.
- You can do this by searching the particular sound you ar looking for in the search box.
- In addition you can manipulate the sound by changing the pitch an speed of the soundtrack. Also when enters the footage and can overlap different sounds and so it can play at the same time or place it on a continous loop.

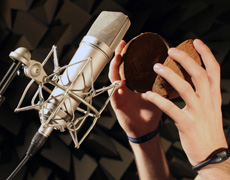
Finally, i have also learnt the process of making Foley sound and why it needs to be used. I know that Jack Foley was the creator of Foley sound, he produce Foley sound by enhancing the sound of everyday objects. For example when someone is knocking on the door, when filming you won't be able to hear it properly, but recording the sound by itself allows the sound to be enhance and significant to the audience as they can relate to these sounds.

Personally, I have taken a great deal of techniques throughout AS media and I hope to use it again in the future. In addition, I have learnt a great deal of planning to make a productive change in the filming


No comments:
Post a Comment